
Hydronephrosis - Knobology and Image Acqusition
Knobology and Image Acquisition
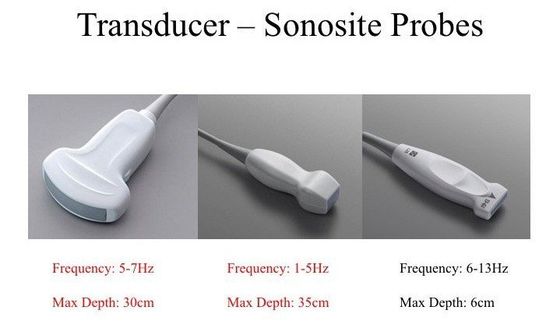
1. Probe Selection
2. Knobology Optimization
3. Imaging Technique
What you need to know for hydronephrosis image acquisition:
2. Knobology Optimization
3. Imaging Technique
1. Probe Selection
The kidneys are deep retroperitoneal structures in the abdomen, therefore low frequency probes are preferable. The transducer of choice is the curvilinear probe. This is because the probe has much wider field of view than the phased-array. As a result, it will be easier to locate the kidneys with this probe and much of the kidney span can be visualized.
However, the phased-array probe is, also, a satisfactory substitute. The only disadvantage is that you may have to interrogate multiple intercostal windows due to its smaller footprint. Nevertheless, the advantage is that you will not image rib shadows with it.
2. Knobology Optimization
Given the kidney is a deep organ, the following maneuvers may improve the image:
Given the kidney is a deep organ, the following maneuvers may improve the image:
- Decrease the Frequency (Switch to "Penetration" Mode): though at the expense of image resolution -- rarely have to use it unless the patient is obese
- Turn ON Tissue Harmonics ("THI" ON): given the kidneys are at quite a distant from the probe, using tissue harmonics generating echo from deep structures of interest then receiving it (Harmonics) mitigates attenuation due to scatter from fat tissue
- Turn ON Compound Imaging
Best is to just try different permutations of these settings to see which yields the best image resolution.
3. Imaging Technique
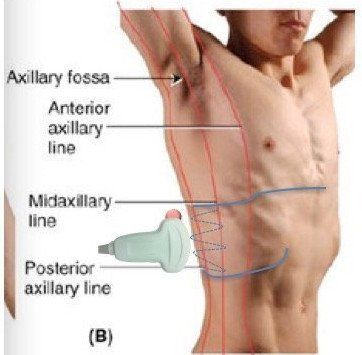
- Use an overhand grip to hold the probe.
- Place the probe in the longitudinal position – indicator pointing towards the head.
- Start from the posterior axillary line at the level of the costal margin: the kidneys are retroperitoneal organs, therefore they are quire dorsal (posterior) -- not uncommonly, you will find your probe hand touches the bed.
- Slide the probe cranially along the posterior axillary line to find the kidney.
- If it cannot be seen, slide the probe ventrally (anteriorly). The kidneys can usually be seen in the area dotted by the blue line.
- Tilt the probe to view the entire kidney.
- Scan the kidneys in both their respective longitudinal and axial planes.
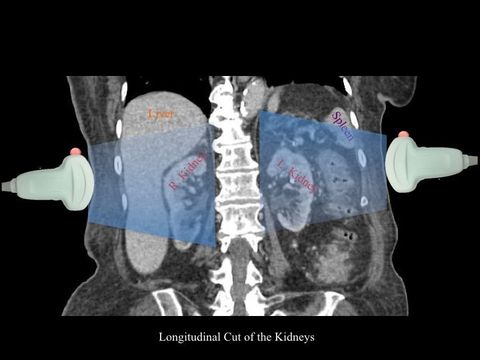
Longitudinal Cut of the Kidney:
The probe's indicator is pointing cephalad. Notice how posterior the kidneys are -- you can see the spine.
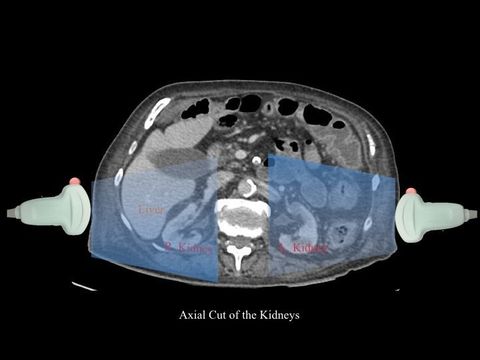
Axial Cut of the Kidney:
The probe's indicator is pointing ventrally. Notice how posterior the kidneys are -- they are the same level of the spine.
Take Home Messages:
- Kidneys are deep organs and situated quite dorsally (posteriorly)
- Scan the kidneys their longitudinal and axial planes